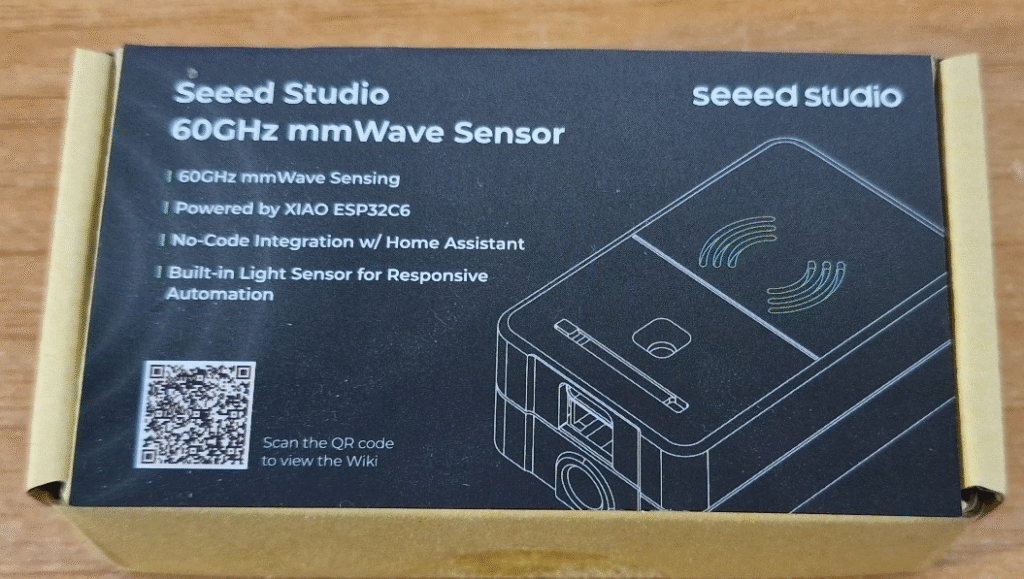
Billed as a “Breathing and Heart Rate Sensor (reference MR60BHA2)” this new device from Seeed Studios got me quite excited…. the device arrived on April 2, 2025 in a well-packed large box maybe 10cm*9cm*13cm. Inside, a small box (9cm*2.5cm*2.7cm) containing the sensor and a double-sided business card pointing the buyer to “building sensors with Seeed Xiao modules” on one side and an ad for their manufacturing service on the other.

Time to open the box – excited? Because I’ve recently been griping about “presence” sensors which fail to notice when I leave my office and movement sensors that can’t handle me sitting dead still to watch YouTube tutorials – maybe this?
The unit (3D-printed early production case – but WELL MADE – doesn’t LOOK 3D-printed) came without instructions – and when I plugged it into USB power – a white light appeared briefly on the unit before going out. I saw nothing new appear in Home Assistant. Dumb… I know. Maybe I was expecting some Bluetooth magic.

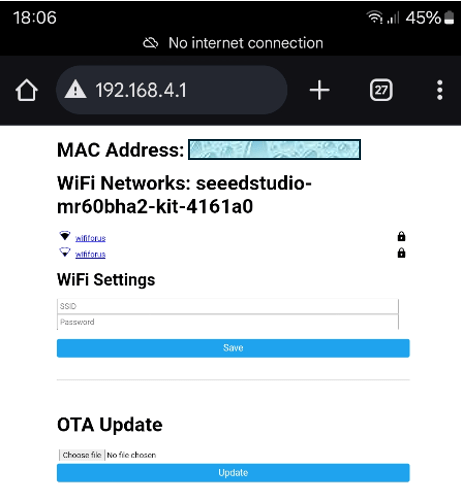
It wasn’t until I checked my phone WiFi and noticed a new access point available that I realised the unit was on and it seemed to be working… “seeedstudio-mr60bha1” appeared as an available access point on the phone so I selected it… “Connected without Internet” said the phone – so I looked at the access point settings – manage router.
I was then given an option to connect the device to my nearest WiFi access point – I did.
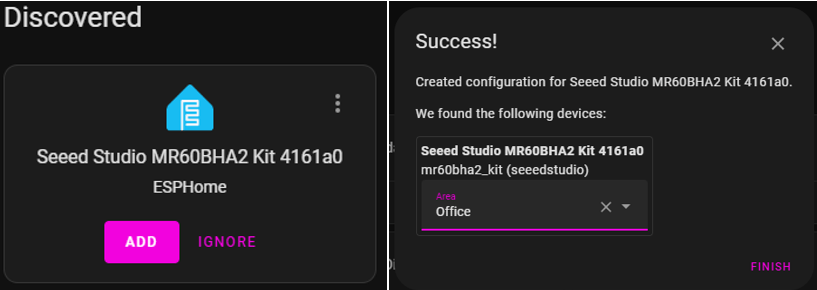
That done, back in Home Assistant I saw a notification saying a new device was available. “check it out”. I did.
And from there I noted the controllable LED light and a host of sensors – in this case “a picture is worth 1000 words” – so – I added the light and sensors into Home Assistant – let me show you some pictures.. starting on my phone as the device’s access point is utilised to let me set up my network SSID on the device and hence add it into the network and make it available to Home Assistant (effortlessly).
You’ll note on the right that it shows up as 192.168.4.1 on my phone until I tell it about my network – anyone who has used Tasmota or other ESP-based devices will recognise this.
With the WiFi set – the device became discoverable in Home Assistant.. All I had to do was hit ADD in HA and (optionally) tell it which area the device was in.
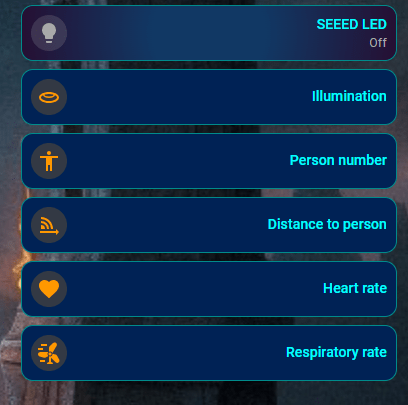
And with that – I could look at the Light control (just like a normal RGB light) and the sensors and the log…
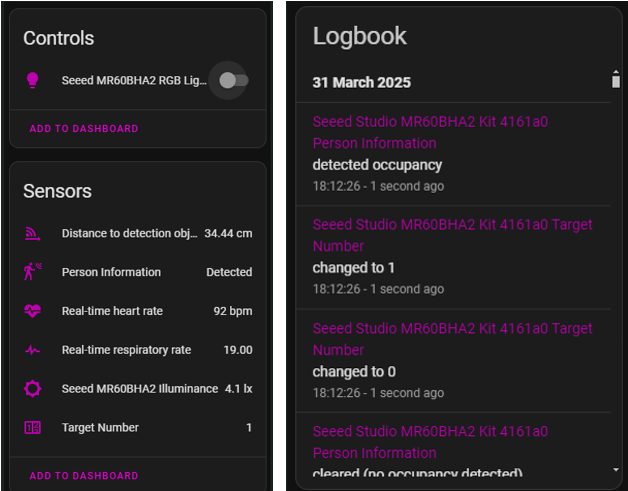
Armed with that information it took me minutes to add the sensors to my Home Assistant dashboard. The very FIRST thing this is going to get used for is an HA automation to RELIABLY turn on and off my office lights depending on if I’m in or out. More on that once it has been tested to death.
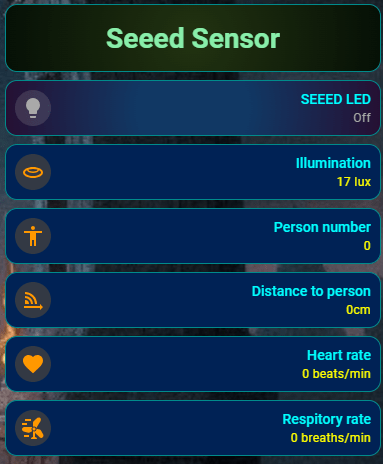
Meanwhile here’s the first attempt to add the SEEED LED and sensors to my dashboard.
As always I used a Mushroom card for the light. Short-press for on-off, long press to access colours and intensity… The wording on the panel on the right is mine.
I’ll make this a lot more compact once the novelty wears off. I think a loud bell in the living room if I stop breathing while still being in my office 🙂 I might even use more appropriate icons 🙂 though the ones on the right aren’t bad.
But not hooking an alarm in before it’s well and truly tested – my wife would have a fit if there was a false alarm…
BUT: There’s always a but… day 2: last night I went to the pub and on testing the sensors I noted 1 person, 60cm away from the sensor – heart rate 80bps, respiratory rate 1 breath per minute… and it wasn’t changing. When I got up this morning – same value.
I disconnected the unit and reconnected the USB (at the unit end) and all was well. I left it to do some work in the garden (on my solar lights – see upcoming article) and on my return, frozen again – and the LED light would not turn on.
I repeated the disconnect/reconnect being careful to fully insert the USB lead, assuming this being down to early version issues.
Day 3: I’ve contacted SEEED to let them know and already received an answer about updating – link here.. and here are a couple of links they sent to me – about presence sensors and about Home Assistant hardware. And finally a product link on AliExpress. Not checked personally but I use AliExpress all the time.
April 10, 2025 Update
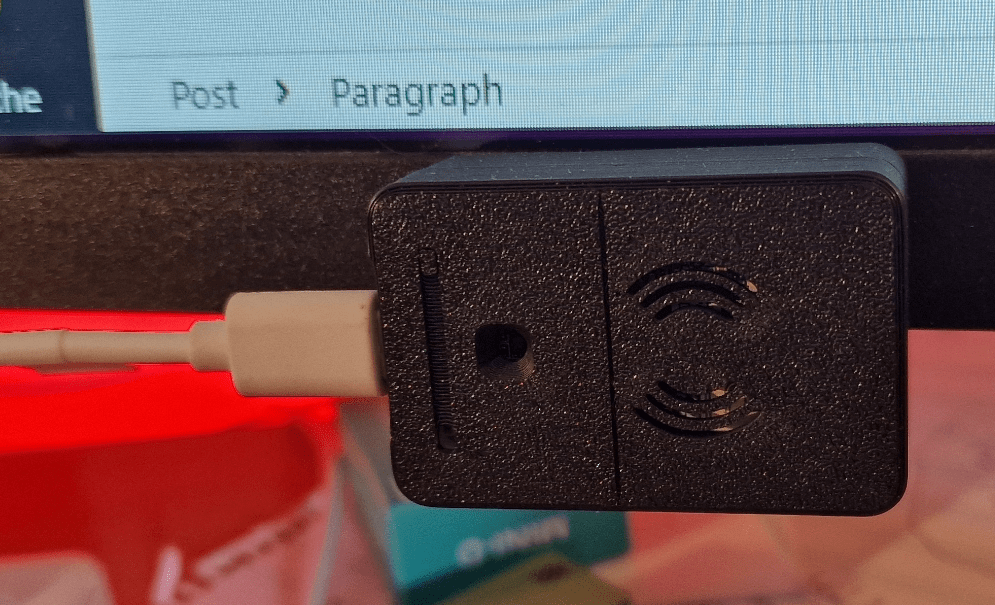
Ok, after updating, the device has been sitting attached to the bottom of one of the two monitors on my desk now for a couple of weeks and the side facing me is the large face with the engravings – it seems to be running 100% reliably. Would have been nicer if the USB connector was out the back instead of the side – but overall this looks like a winner. Soon I will be looking to use it as the main presence sensor for my office so I can allocate jobs elsewhere for my also reliable Apollo radar sensors.
Before anyone asks – and I quote:
“The International Commission on Non-Ionizing Radiation Protection (ICNIRP), World Health Organization (WHO), and national agencies (e.g., Health Canada, ANSES in France) have reviewed available evidence and maintain that, provided exposure remains below established limits, there are no known health consequences from mmWave radiation, including at 60 GHz. The output from these and similar radar devices is orders of magnitude below the guideline figures.”
June 10, 2025 Update
The unit has been sitting on the bottom of my monitor since early April and I just noticed that although the light is working correctly, heart rate and breathing are not – and distance appears to be miles out.. I’ve asked Seeed for comment…
And now – the Seeed ESP32-S3 Board with External Antenna
While I’m here – the Seeed pre-soldered ESP32-S3 board with external antenna: I received this a while ago and did nothing with it – I’ll correct that now – the unit comes with an external antenna socket and small antenna. Veery handy as over time I’ve had MANY ESP8266 and ESP32 boards from many suppliers and just occasionally the signal has been very pool because of positioning (or in the case of some ESP32-C3 board, just bad board design).

So, in at the deep end, I’ll plug the board into my serial port on the PC and see what happens (I’ve also had some boards which don’t like the pretty standard serial drivers on my Windows 11 Pro PC). Firstly I checked the Seeed board on WiFi (Advanced IP Scanner) to make sure I’ve not previously used it and forgotten – nothing there…. red light on the right near the USB-C working, yellow light other side of USB-C connector flashing occasionally. Good start.
And now USB – my PC makes a re-assuring “connected” sound when I plug in the Seeed ESP32-S3 for the first time..
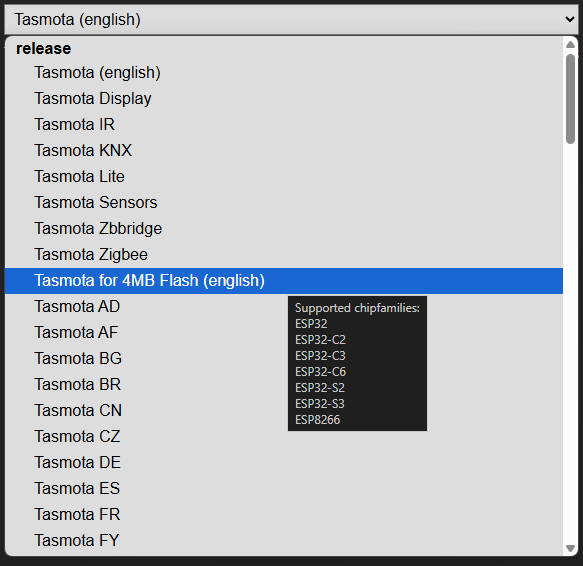
As I often do, my first stop is the Tasmota flashing page – a good start to ensuring I have the right serial driver… always as well to hover over the selector to see what devices are supported – if only it was as simple as “ESP8266, ESP32” – but no.
Looks like the 4MB vesion of Tasmota is supported here so I select and the installer opens up another dialog box to select the USB port the device is attached to.
Do I want to install Tasmota? Sure. Note, no button pressing needed here unlike some ESP boards… the USB-C connector handles everything. I accept the option to “erase all” and within 2 minutes I have a board with Tasmota on it. “Installation complete – next”. I select “logs and console” and I have a Tasmota- kitted out Seeed board ready to enter details at the console. I confirm the board is working by simply syping “ssid” at the console – and there is a response – of course the WiFi SSID is empty.
If this is new to you, I use the backlog console command in Tasmota to set evreything up at once – I’ve put dummy passwords in here but everything else is functional on my system
backlog ssid1 noname; password1 yyyyyyy; mqtthost 192.168.1.20; mqttuser admin; mqttpassword xxxxxxx; topic seeed-esp32-s3-1; hostname seeed-esp32-s3-1; devicename seeed-esp32-s3-1; friendlyname seeed-esp32-s3-1; so53 1; timezone 99; status 5;
and there it is.. I enter the above at the Tamota console on my PC browser screen and seconds later..
00:00:00.001 CMD: Using USB CDC
00:00:00.002 HDW: ESP32-S3 v0.2
00:00:00.010 UFS: FlashFS mounted with 4404 kB free
00:00:00.020 CFG: Loaded from File, Count 7
00:00:00.021 SER: Set to 8N1 115200 bit/s
00:00:00.021 SER: HWCDC supports 115200 bit/s only
00:00:00.027 QPC: Count 1
00:00:00.064 BRY: Berry initialized, RAM used 3796 bytes
00:00:00.080 Project tasmota - seeed-esp32-s3-1 Version 14.6.0(release-tasmota32)-3_1_3(2025-04-16T11:21:30)
00:00:01.898 WIF: Connecting to AP1 noname in mode HT40 as seeed-esp32-s3-1...
00:00:05.532 WIF: Connected
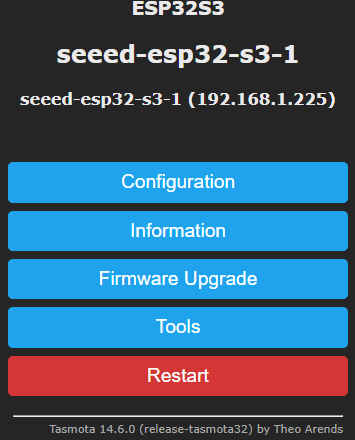
00:00:05.793 HTP: Web server active on seeed-esp32-s3-1 with IP address 192.168.1.225
10:04:06.717 MQT: Attempting connection...
10:04:06.791 MQT: Connected
10:04:06.798 MQT: tele/seeed-esp32-s3-1/LWT = Online (retained)
10:04:06.801 MQT: cmnd/seeed-esp32-s3-1/POWER =
10:04:06.808 MQT: tele/seeed-esp32-s3-1/INFO1 = {"Info1":{"Module":"ESP32S3","Version":"14.6.0(release-tasmota32)","FallbackTopic":"cmnd/DVES_16E1E4_fb/","GroupTopic":"cmnd/tasmotas/"}}
10:04:06.814 MQT: tele/seeed-esp32-s3-1/INFO2 = {"Info2":{"WebServerMode":"Admin","Hostname":"seeed-esp32-s3-1","IPAddress":"192.168.1.225","IP6Global":"","IP6Local":"fe80::ceba:97ff:fe16:e1e4%st1"}}
10:04:06.819 MQT: tele/seeed-esp32-s3-1/INFO3 = {"Info3":{"RestartReason":"Software reset CPU","BootCount":2}}
10:04:06.894 QPC: Reset
10:04:11.009 MQT: tele/seeed-esp32-s3-1/STATE = {"Time":"2025-06-09T10:04:10","Uptime":"0T00:00:11","UptimeSec":11,"Heap":230,"SleepMode":"Dynamic","Sleep":50,"LoadAvg":38,"MqttCount":1,"Berry":{"HeapUsed":3,"Objects":44},"Wifi":{"AP":1,"SSId":"noname","BSSId":"8C:53:C3:0C:BD:3A","Channel":5,"Mode":"HT40","RSSI":60,"Signal":-70,"LinkCount":1,"Downtime":"0T00:00:06"}}
10:04:17.268 MQT: stat/seeed-esp32-s3-1/STATUS1 = {"StatusPRM":{"Baudrate":115200,"SerialConfig":"8N1","GroupTopic":"tasmotas","OtaUrl":"http://ota.tasmota.com/tasmota32/release/tasmota32s3.bin","RestartReason":"Software reset CPU","Uptime":"0T00:00:18","StartupUTC":"2025-06-09T09:03:59","Sleep":50,"CfgHolder":4617,"BootCount":2,"BCResetTime":"2025-06-09T10:04:06","SaveCount":9}}
10:04:17.322 MQT: stat/seeed-esp32-s3-1/STATUS11 = {"StatusSTS":{"Time":"2025-06-09T10:04:17","Uptime":"0T00:00:18","UptimeSec":18,"Heap":227,"SleepMode":"Dynamic","Sleep":50,"LoadAvg":21,"MqttCount":1,"Berry":{"HeapUsed":3,"Objects":44},"Wifi":{"AP":1,"SSId":"noname","BSSId":"8C:53:C3:0C:BD:3A","Channel":5,"Mode":"HT40","RSSI":62,"Signal":-69,"LinkCount":1,"Downtime":"0T00:00:06"}}}
And what does the Tasmota INFO page say? At this point I should be able to go off to http://seeed-esp32-s3-1.lan on my PC and find out.. I CAN.
And the information page tells me this is an ESP32-S3 v0.2 board with not 4MB but 8MB of FLASH and 226KB of free RAM. Good start.
Two identically-placed boards – same SSID, same WiFi channel: the ESP8266 is showing RSSI 42%, -79DBm signal, the Seeed board RSSI 60%, -70DBm – that’s a good start. And of course, with 8MB Flash, this particular ESP82-S3 board has a file system with 4MB free. Of course, Tasmota is only the beginning. There is the general Arduino environment to work in, Seeed’s own development software, ESP-Home, WLED and more.
WLED installation is very easy as is Tasmota – I’ll leave ESP-Home and others for another time.